How to Waterproof a Pond Using Liquid Rubber: A Step-by-Step Guide


How to Waterproof a Pond Using Liquid Rubber: A Step-by-Step Guide
Waterproofing a pond is essential for maintaining a healthy aquatic environment and preventing leaks.
Using Liquid Rubber offers an effective solution that creates a durable, flexible barrier against water loss. This method is not only efficient but also safe for aquatic life, making it a popular choice among pond owners.

Before starting the waterproofing process, proper preparation is crucial.
This includes cleaning the pond thoroughly and selecting the right materials to ensure a long-lasting seal.
Using Liquid Rubber can significantly enhance the lifespan of the pond, providing both peace of mind and cost savings in the long run.
With a straightforward application process, Liquid Rubber can transform various pond surfaces, including concrete and liners.
Once applied, it is important to follow recommended curing times for the best results.
By taking these steps, pond owners can enjoy a beautiful, thriving ecosystem without the worry of leaks.
Key Takeaways
- Liquid Rubber is a reliable method for waterproofing ponds and preventing leaks.
- Proper preparation and material selection enhance the success of the waterproofing process.
- Following recommended curing times is essential for long-lasting results.
Benefits of Pond Waterproofing
Waterproofing a pond brings several advantages that enhance both its longevity and visual appeal.
Proper techniques, such as using liquid rubber, ensure a well-maintained environment for aquatic life while providing an attractive landscape feature.
Extending Lifespan of the Pond
Waterproofing significantly increases the lifespan of a pond by preventing leaks and maintaining water levels.
Over time, natural wear and tear can lead to cracks in concrete ponds. When not addressed, these cracks can expand, causing greater damage and potential loss of koi or other aquatic life.
Using a liquid rubber coating forms a durable barrier against water loss.
This method not only helps seal existing cracks but also allows for flexibility, accommodating temperature changes without cracking or peeling.
A well-waterproofed pond reduces the need for frequent repairs, saving both time and money in the long run.
Enhancing Aesthetic Appeal
A waterproofed pond greatly enhances its overall aesthetic appeal.
A well-maintained pond reflects light beautifully, creating a serene environment.
Liquid rubber products can be applied in colours that blend well with the garden, improving the overall landscape design.
In addition to appearance, waterproofing contributes to a healthier ecosystem.
By preventing water loss, the clarity and depth of water can be maintained, allowing for vibrant aquatic plants and fish.
A stunning, well-kept pond becomes a focal point of the garden, attracting wildlife and offering a peaceful retreat.
Preparation Before Waterproofing
Before waterproofing a pond, it is essential to ensure the surface is ready for treatment.
This involves a thorough inspection for leaks and a detailed cleaning of the pond surface.
Proper preparation helps achieve the best results when applying liquid rubber.
Inspecting the Pond for Leaks
Start by inspecting the pond for any visible leaks.
This can include checking areas around the edges, joints, and the pond liner for cracks or holes.
Leaks can lead to water loss and may compromise the integrity of the waterproofing process.
Use a water tester to determine if there are areas where water levels drop significantly.
Mark suspected spots for further attention.
Any leaks found should be repaired before moving forward.
Using a suitable pond repair kit can help seal these areas effectively, ensuring a tight barrier against future water loss.
Cleaning the Pond Surface
Thoroughly cleaning the pond surface is a vital step.
This process begins with removing any debris, such as leaves, algae, or mud, to expose the underlying material.
A clean surface enhances adhesion for the liquid rubber.
Once debris is cleared, wash the surface using a pressure washer or a hose with a suitable cleaner.
This helps eliminate grime and any remaining contaminants.
Ensure that the surface is completely dry before applying the liquid rubber, as moisture can hinder the sealing process.
Taking these steps will prepare the pond for successful waterproofing.
Choosing the Right Waterproofing Materials

Selecting the appropriate waterproofing materials is crucial for ensuring a durable and effective pond seal.
The materials must provide strong protection against leaks and be safe for aquatic life.
The following subsections will focus on essential waterproofing options and additional supplies needed for the process.
Liquid Rubber Sealants
Liquid rubber sealants are a popular choice for waterproofing ponds due to their high elasticity and durability.
The Liquid Rubber Neopond Sealant is particularly effective as it can withstand water pressure and prevents leaks for long periods.
When applying this sealant, it is important to use a Liquid Rubber EPDM Primer on surfaces like concrete or wood.
This primer promotes better adhesion of the sealant to the surface, ensuring a reliable waterproof barrier.
Additionally, using liquid rubber seam tape can enhance the waterproofing process.
It seals joints and repairs cracks, reinforcing vulnerable areas in the pond structure.
Multiple coats of the sealant are recommended, allowing each layer to cure for 24 hours for maximum effectiveness.
Additional Tools and Supplies
Having the right tools and supplies is essential for successful waterproofing.
A high-quality brush or roller is necessary for evenly applying the liquid rubber sealant.
A Liquid Rubber Multi-Purpose Primer should be used first for prep work.
This ensures that the sealant adheres properly to various surfaces, including PVC and EPDM liners.
Other important items include cleaning tools to prepare the pond surface and protective gear such as gloves and masks.
These will ensure safety during application, especially when working with chemicals.
With the right materials and tools, the task of waterproofing a pond can be both efficient and effective.
How to Apply Liquid Rubber on Pond Liners

Applying Liquid Rubber to pond liners is an essential step to ensure a watertight seal and extend the life of the pond.
Proper preparation and effective application techniques contribute significantly to the success of the waterproofing process.
Preparing the Liquid Rubber
Before applying Liquid Rubber, it is important to prepare the material properly.
First, ensure that the container is well mixed.
Stir the liquid thoroughly using a paddle mixer for several minutes to achieve a consistent texture.
Next, check the ambient temperature; Liquid Rubber should be applied when temperatures are above 10°C for optimal performance.
Clean the pond liner surface thoroughly to remove dirt, debris, or old sealants.
Using a power washer or a scrub brush will help achieve a clean surface. Allow the surface to dry completely before starting the application.
Proper preparation lays the foundation for a successful waterproof seal.
Application Techniques
When applying Liquid Rubber, several techniques will ensure an even and effective coating.
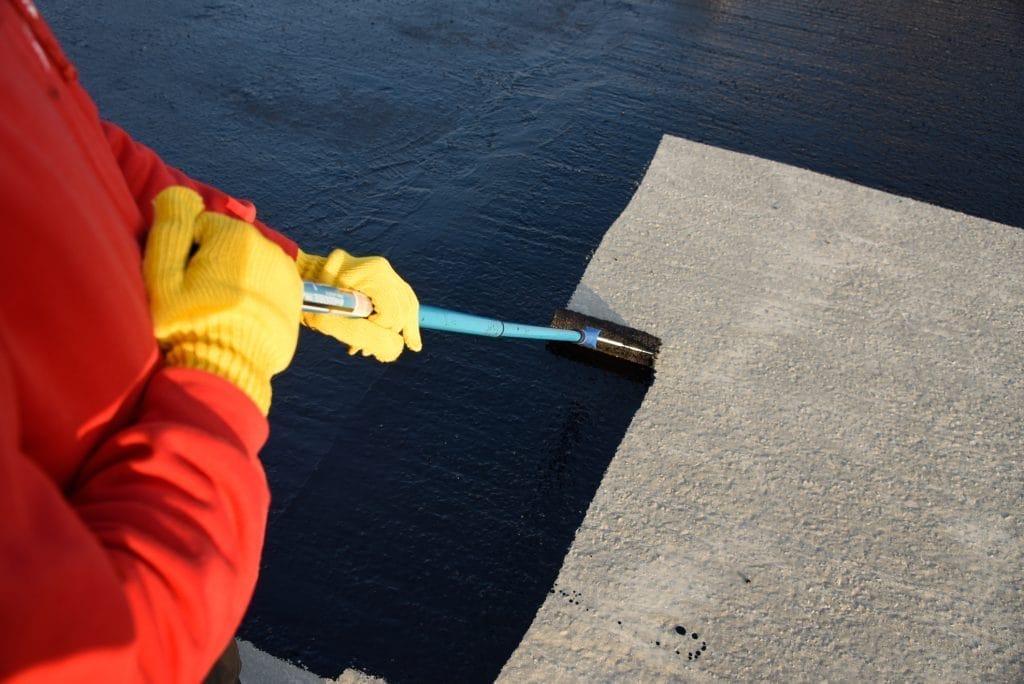
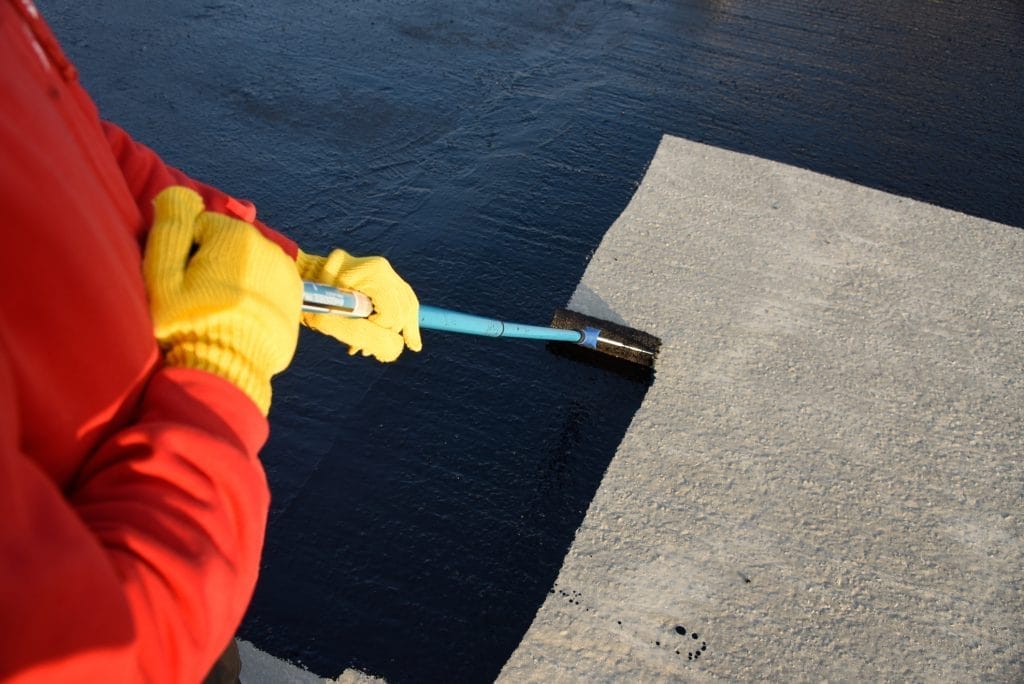
Start by using a brush or roller for corners and intricate areas. This allows for precise application where needed.
For larger areas, a paint sprayer can facilitate smoother coverage.
During application, a minimum of three coats is recommended.
It’s best to apply the first coat evenly and then allow it to cure for 24 hours.
After curing, apply the second coat, followed by the third.
Reinforcing seams and joints with Liquid Rubber Seam Tape can enhance durability.
Ensure each coat is allowed to dry completely before adding the next.
Follow these steps for a robust waterproof barrier.
Waterproofing Concrete Ponds

Waterproofing a concrete pond is essential for maintaining water levels and the health of aquatic life. This process involves using specific treatments and sealants designed to create a strong barrier against water loss.
Surface Treatments for Concrete
Before applying any waterproofing products, surface preparation is crucial.
The concrete must be clean and dry. This can be achieved by removing any debris, algae, or previous coatings using a pressure washer or wire brush.
Once clean, any cracks or damage should be repaired with a suitable concrete filler.
Once the surface is prepped, it can be smoothed. Achieving a smooth surface helps in better adhesion for the waterproof coating.
Next, applying a primer specifically designed for concrete enhances bonding of the waterproof sealant. The choice of primer will depend on the type of waterproofing system being used.
Applying the Waterproof Coating
For waterproofing concrete ponds, Liquid Rubber Waterproof Sealant is highly effective.
This sealant boasts a high elasticity which allows it to expand and contract with temperature changes, helping to prevent cracks from forming.
To apply, first, stir the Liquid Rubber thoroughly.
Using a roller or brush, apply a generous coat evenly over the surface.
It’s recommended to apply at least three coats. Each coat should be allowed to cure for 24 hours before applying the next one.
Pay special attention to joints and corners, ensuring these areas have a thicker application.
After the final coat, allow for a full curing period of at least two weeks.
This will ensure a robust and durable waterproof barrier is formed, effectively protecting the concrete from water penetration.
Ensuring a Safe Environment for Koi
Creating a safe environment for koi is crucial for their health and well-being.
This involves selecting non-toxic materials for the pond and performing thorough checks to ensure their habitat is safe.
Selecting Non-Toxic Materials
When waterproofing a koi pond, it's essential to use materials that are safe for fish.
Liquid Rubber is a popular choice, as it is free from harmful chemicals and certified for use in water bodies containing fish.
In addition to the base sealant, consider using products like Liquid Rubber Seam Tape.
This can reinforce joints and seams to prevent leaks.
It’s important for any materials chosen to be non-toxic and environmentally friendly.
Before applying any product, read the labels carefully.
Look for certifications that indicate safety for aquatic life.
Avoid using traditional paints or sealants that may contain harmful solvents, as these can leach into the water.
Final Checks for Koi Habitats
Once the waterproofing is completed, conducting a thorough inspection of the pond is vital. Check for any sharp edges or uneven surfaces that could harm the koi.
Smooth out any sharp areas to create a safe swimming space.
After the sealant has cured, test the water for any toxic substances before introducing koi into the pond. Use water testing kits to check for harmful chemicals.
Ensure the pH levels and ammonia content are suitable for koi.
Lastly, monitor the water quality regularly.
Keeping the environment clean and safe is key to the health of koi. Regular maintenance checks will keep their habitat safe and enjoyable for them.
Curing and Drying Time
Curing and drying time are crucial steps in the waterproofing process using liquid rubber. Understanding these times ensures optimal results and long-lasting protection for the pond.
Understanding the Curing Process
Curing is the process where the liquid rubber solidifies and bonds to the surface. It typically takes between 24 to 48 hours for initial drying, but complete curing can take longer, especially if multiple coats are applied.
Once the first coat is applied, it is important to allow it to cure fully before adding additional layers.
This ensures that each coat adheres properly and forms a strong waterproof barrier.
The final membrane should be allowed at least two weeks to cure fully before the pond is filled with water.
Proper curing helps achieve maximum elasticity and durability, which are key features of liquid rubber.
Factors Affecting Drying Time
Several factors can influence how quickly liquid rubber dries. One significant factor is the application thickness.
- Temperature: Higher temperatures speed up the drying process. Ideal conditions are around 20°C to 25°C.
- Humidity: High humidity levels can slow down drying times.
- Airflow: Good ventilation helps moisture escape, promoting faster drying.
Before proceeding with each coat, it is best to check the surface type.
Some surfaces may retain moisture differently, impacting overall drying times. Generally, it is wise to monitor conditions and adjust plans accordingly.
Maintenance after Waterproofing
Maintaining a pond after waterproofing is essential for long-lasting performance. The right care ensures that the waterproof seal remains effective and the pond stays functional and safe for aquatic life.
Regular inspections and prompt attention to any damage will help keep the pond in excellent condition.
Regular Check-Ups
Conducting regular check-ups of the pond is vital. At least once a month, inspect the surface for any visible cracks or peels in the waterproofing layer.
Check the seams, particularly where different materials meet, as these areas can be prone to wear.
Signs to watch for:
- Cracks or bubbling in the waterproofing material
- Discolouration or fading of the sealant
- Water loss that seems excessive
Prompt attention to these signs can prevent more significant issues.
If any issues are discovered, repairs should be made swiftly to maintain the integrity of the pond's waterproofing.
Addressing Wear and Tear
Over time, wear and tear can affect the waterproofing layer. Factors like UV exposure, temperature changes, and shifting ground can contribute to this wear.
When observing damage, it is crucial to take immediate action.
Steps for addressing wear and tear:
- Clean the affected area to remove debris and algae.
- Apply additional liquid rubber as needed, ensuring a proper bond with existing material.
- Reinforce any seams or joints with Liquid Rubber Seam Tape for added support.
Regular maintenance, including touching up areas that show signs of wear, can extend the life of the waterproofing and keep the pond safe and appealing.
Environmental Considerations
Protecting the environment is crucial when waterproofing a pond. Careful selection of products and sustainable practices can minimise negative impacts while achieving waterproofing goals.
Using VOC-Free Products
Volatile Organic Compounds (VOCs) can harm the environment and contribute to air pollution.
When choosing materials for pond waterproofing, it's wise to select VOC-free products.
Liquid Rubber is an excellent option because it contains no harmful VOCs. This means it is safer for both aquatic life and humans.
Using VOC-free materials ensures that harmful emissions do not enter the air during application.
This significantly reduces the ecological footprint of the project. Furthermore, this choice helps maintain water quality in the pond, protecting fish and plant life.
Sustainability Practices
Incorporating sustainability practices into pond waterproofing enhances environmental responsibility.
For instance, using recyclable materials can reduce waste. Liquid Rubber is often packaged in recyclable containers, making disposal easier.
Additionally, planning projects to maximise efficiency is important.
This includes using the right amount of product, thereby minimising excess waste.
Taking care to clean and prepare surfaces before applying Liquid Rubber can also extend its life, resulting in fewer applications and reduced material use.
Lastly, considering the pond's surroundings during installation is essential.
Maintaining natural habits can protect local wildlife and support biodiversity. Taking these steps promotes a healthier ecosystem while effectively waterproofing the pond.
Troubleshooting Common Issues
Waterproofing a pond with Liquid Rubber can lead to excellent results, but sometimes issues arise. Common problems include leaks and adhesion challenges. Each issue can be addressed effectively with some simple steps.
Leaks and Imperfections
Leaks can occur even after the pond has been sealed. Common causes may include improper application or surface preparation.
To address leaks, first inspect the pond for visible cracks or weak spots.
Steps to fix leaks:
- Identify the Leak: Look for damp areas or dripping.
- Clean the Area: Remove any dirt or debris around the leaks.
- Reapply Liquid Rubber: Brush on an additional coat, ensuring to extend it beyond the leak area to create a strong seal.
- Allow for Curing: Ensure it cures according to the manufacturer's guidelines before refilling the pond.
For persistent leaks, consider using Liquid Rubber Seam Tape over cracked areas for a tighter seal.
Adhesion Problems
Adhesion issues may prevent Liquid Rubber from sticking correctly to the pond surface.
This can be due to moisture, oils, or foreign substances on the surface.
To improve adhesion:
- Surface Preparation: Clean the surface thoroughly.
- For porous materials like wood, ensure the surface is completely dry before application.
- Use Primers: In some cases, a primer may be necessary to enhance adhesion.
- Apply Multiple Coats: When applying Liquid Rubber, multiple thin coats usually adhere better than one thick layer.
If adhesion problems persist, revisiting the surface preparation steps may be essential to achieve the desired results.

Frequently Asked Questions
MY POND IS OVERGROWN.
MY POND IS LEAKING – WHAT CAN I DO?
WHY IS MY POND WATER GREEN?
Do I need to have my pumps running all the time?
Why Choose Us
Experience With years of experience in pond maintenance and cleaning, our team has the expertise to handle ponds of all sizes and complexities. We are dedicated to delivering high-quality services tailored to meet the unique needs of each customer.
Professionalism Our team consists of trained professionals who are passionate about pond care. We take pride in our work and strive to exceed our customers’ expectations with every service we provide.
Customized Solutions We understand that every pond is different, and we tailor our services to suit the specific requirements of each customer. Whether you have a small backyard pond or a larger water feature, we have the knowledge and resources to keep it in pristine condition.
Environmentally Friendly Practices We are committed to using eco-friendly products and methods in our pond cleaning services. Our goal is to promote sustainability and preserve the natural balance of your pond ecosystem.
Customer Satisfaction Your satisfaction is our top priority. We work closely with our customers to ensure that their pond maintenance needs are met with professionalism and care. We take the time to listen to your concerns and provide personalized recommendations to help you achieve the pond of your dreams.
Ready to schedule a pond cleaning service with us?
Contact Aqua Pond today to learn more about our services and to book an appointment.
Let us help you create a clean, healthy, and vibrant pond that you can enjoy for years. Thank you for considering Aqua Pond for your pond maintenance needs.
What our Customers Say...
